Does your breakfast routine feel a little… stale? You’re not alone! Many of us rush through mornings with a less-than-satisfying start. That’s why I swear by homemade granola bars—they’re simple to make, full of wholesome ingredients, and way tastier (and healthier!) than store-bought options. Imagine grabbing a bar packed with oats, nuts, and natural sweetness, knowing you’re giving your body the fuel it needs to tackle the day. Let’s dive into why these granola bars are the ultimate breakfast hack you’ve been craving!
Table of Contents
Why Homemade Granola Bars Beat Store-Bought Every Time
Regarding breakfast on the go, granola bars are a popular choice. But not all granola bars are created equal. Here’s why making your own at home is the way to go:
Avoid Preservatives and Artificial Sweeteners
One of the biggest advantages of homemade granola bars is that you have complete control over the ingredients. Store-bought varieties often contain preservatives to extend shelf life and artificial sweeteners to enhance flavor. You can use simple, wholesome ingredients without any unnecessary additives by making your own.
I remember the first time I flipped over a box of my favorite store-bought granola bars and read the ingredient list. I was shocked to see words I couldn’t even pronounce! That was the moment I decided to start making my own.
Customize Ingredients to Suit Your Taste or Dietary Needs
When you make granola bars at home, the possibilities are endless. Do you love the crunch of almonds? Add extra! Can’t stand raisins? Leave them out entirely. By customizing your bars, you ensure that every bite is exactly to your liking.
This customization is especially important for those with dietary restrictions or food allergies. You can easily make gluten-free, dairy-free, or nut-free versions to suit your needs. Over the years, I’ve experimented with countless combinations, from a tropical blend with coconut and dried pineapple to a decadent dark chocolate and sea salt version for an occasional treat.
Save Money by Making Large Batches at Home
While the initial investment in ingredients might seem higher, making your granola bars can save you money in the long run. Store-bought bars can cost upwards of $1 each, while homemade versions often work out to less than 50 cents per bar.
Additionally, you can make huge clumps and solidify them for afterward use. I typically make a double batch every other weekend, which provides enough bars for my family’s breakfasts and snacks for the entire month. It’s a small-time investment that pays off in both savings and satisfaction.
Ingredients You’ll Need for the Perfect Granola Bars
Now that you’re convinced to try making your granola bars, let’s talk ingredients. The beauty of homemade bars is their versatility, but there are some key components you’ll want to include:
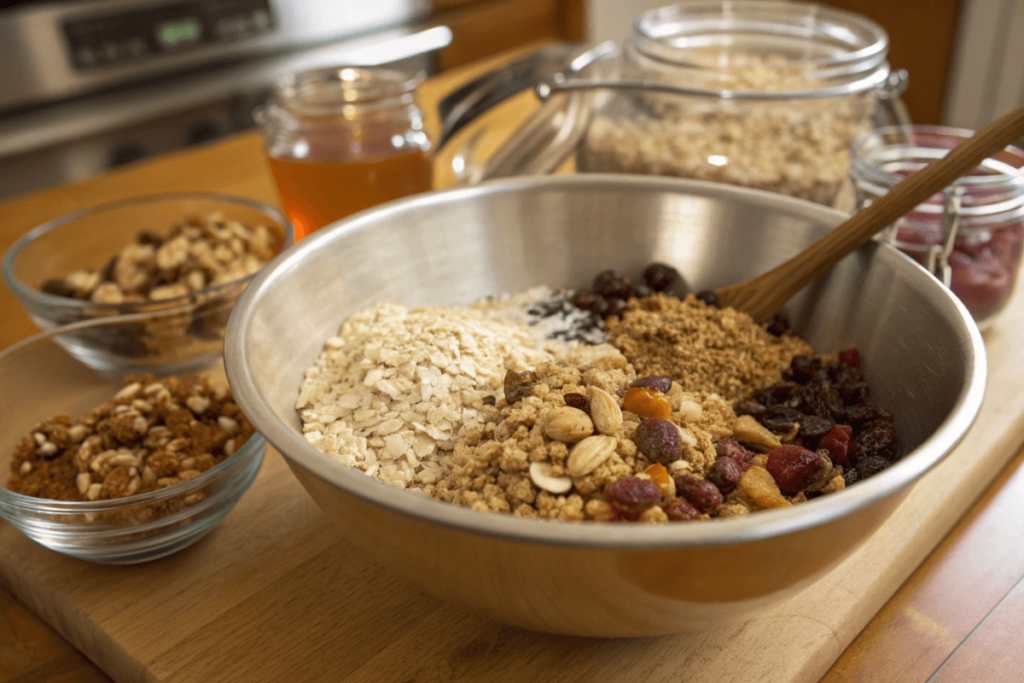
Common Staples: Rolled Oats, Nuts, Seeds, and Honey
The base of most granola bars is rolled oats. They provide a hearty texture and are packed with fiber and nutrients. I prefer old-fashioned rolled oats over quick oats, as they hold their shape better and provide more texture.
Nuts and seeds include crunch, flavor, and sound fats. Some of my favorites include:
- Almonds
- Walnuts
- Pecans
- Pumpkin seeds
- Sunflower seeds
Honey serves as both a sweetener and a binder, helping to hold your bars together. If you’re vegan, maple syrup makes an excellent substitute.
Fun Add-Ins: Dried Fruit, Chocolate Chips, and Spices
This is where you can really get creative! Dried fruits add natural sweetness and chewy texture. Some popular options include:
- Raisins
- Cranberries
- Chopped dates
- Dried blueberries
- Dried apricots
For those with a sweet tooth, a sprinkle of chocolate chips can make your granola bars feel like a treat. I like to use dark chocolate for its antioxidant properties and rich flavor.
Spices can elevate the flavor profile of your bars. A dash of cinnamon is classic, but don’t be afraid to experiment with nutmeg, ginger, or even a pinch of cardamom.
Substitutions for Special Diets: Gluten-Free, Vegan, or Low-Sugar Options
If you’re following a specific diet, there are plenty of ways to adapt your granola bar recipe:
- For gluten-free bars, use certified gluten-free oats and check that all other ingredients are gluten-free.
- Vegan bars can be made by swapping honey for maple syrup or agave nectar.
- To reduce sugar content, use unsweetened dried fruit and increase the proportion of nuts and seeds.
I’ve found that chia seeds or ground flaxseed can act as excellent binders in place of eggs for vegan recipes. They also add a nutritional boost!
Step-by-Step Guide to Making Homemade Granola Bars

Now that we’ve covered the ingredients, let’s walk through the process of making your delicious granola bars. Don’t worry – it’s easier than you might think!
Prep Time and Tools You’ll Need
Before you start, gather these basic tools:
- Large mixing bowl
- Measuring cups and spoons
- 9×13 inch baking pan
- Parchment paper
- Spatula
The total prep time is usually around 15-20 minutes, plus baking and cooling time. I like to make my bars on Sunday afternoons while catching up on podcasts – it’s become a relaxing weekend ritual.
Mixing the Dry and Wet Ingredients
Begin by combining your dry fixings in a huge blending bowl. This typically includes:
- 3 cups rolled oats
- 1 cup chopped nuts
- 1/2 cup seeds
- 1/2 cup dried fruit
- Any spices you’re using
In an isolated bowl, whisk together your damp ingredients:
- 1/2 cup honey or maple syrup
- 1/4 cup coconut oil or butter, melted
- 1 teaspoon vanilla extract
Pour the damp fixings over the dry and blend. The blend ought to be marginally sticky and hold together when pressed.
Baking (or No-Bake!) Techniques for the Perfect Texture
For baked granola bars:
- Preheat your oven to 350°F (175°C).
- Line your heating container with material paper, taking off a few overhangs for simple removal.
- Press the mixture firmly into the pan. Use the back of a spatula or your hands to really compact it – this helps the bars hold together.
- Bake for 20-25 minutes, until the edges are brilliant brown.
- Allow to cool completely before cutting into bars.
For no-bake bars:
- After mixing the ingredients, press firmly into the lined pan.
- Refrigerate for at least 2 hours or overnight.
- Cut into bars once chilled and firm.
I prefer the baked version for a slightly crunchy texture, but the no-bake method is great for hot summer days when you don’t want to turn on the oven.
Tips to Make Your Granola Bars Last All Week

One of the best things about homemade granola bars is that you can make a big batch to last you through the week. Here’s how to keep them fresh and convenient:
Storage Tips to Keep Bars Fresh and Chewy
To maintain optimal texture:
- Allow bars to cool completely before storing.
- Layer bars between sheets of parchment paper to prevent sticking.
- Store in a waterproof holder at room temperature for up to a week.
- For extra protection against humidity, add a slice of bread to the container – it will absorb excess moisture and keep your bars chewy.
Freezing for Long-Term Meal Prep
Granola bars freeze beautifully, making them perfect for long-term meal prep:
- Wrap person bars in material paper or plastic wrap.
- Put wrapped bars in a freezer-safe holder or zip-top sack.
- Freeze for up to 3 months.
- Defrost at room temperature for around an hour some time recently eating.
I often make a double batch and freeze half, ensuring I always have a quick breakfast or snack on hand.
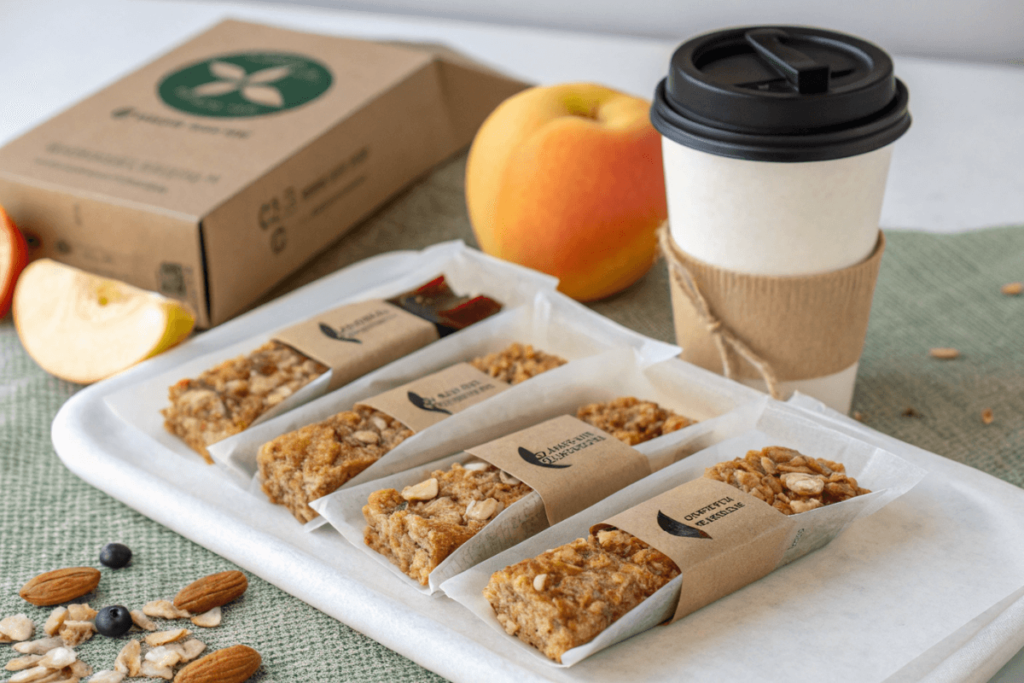
Portioning and Packaging for Grab-and-Go Convenience
To make your mornings even easier:
- Cut bars into individual portions before storing.
- Wrap each bar separately for easy grabbing.
- Consider using reusable silicone bags or beeswax wraps for an eco-friendly option.
I like to package my bars with a piece of fruit and a handful of nuts for a complete, balanced breakfast that I can take on the go.
Looking for more ways to simplify your mornings? Check out our Easy Breakfast Meal Prep Ideas for additional time-saving recipes!
Creative Variations for Every Craving
Once you’ve mastered the basic recipe, it’s time to get creative! Here are some of my favorite variations to keep things interesting:
Peanut Butter and Chocolate for a Decadent Treat
For a more indulgent bar:
- Replace 1/4 cup of the honey with 1/4 cup creamy peanut butter.
- Add 1/3 cup mini chocolate chips to the dry ingredients.
- Drizzle melted dark chocolate over the cooled bars for extra decadence.
These bars taste like a healthier version of a peanut butter cup – perfect for satisfying sweet cravings!
Tropical-Inspired Bars with Coconut and Pineapple
For a taste of the tropics:
- Add 1/2 glass of destroyed coconut to the dry fixings.
- Use chopped dried pineapple and mango as your fruit.
- Include a 1/4 teaspoon of ground ginger for a zingy kick.
These bars always transport me back to beach vacations, even on the dreariest mornings.
High-Protein Options for Workout Fuel
To boost the protein content:
- Add 1/4 cup of protein powder to the dry ingredients.
- Use a mix of chopped nuts and seeds high in protein, like almonds and pumpkin seeds.
- Include 2 tablespoons of chia seeds or ground flaxseed.
These protein-packed bars are great for post-workout recovery or as a filling mid-afternoon snack.
The Benefits of Starting Your Day with Homemade Granola Bars
Beyond just being delicious, there are numerous benefits to starting your day with a homemade granola bar:
Nutritional Benefits: Fiber, Protein, and Sustained Energy
Homemade granola bars can be a nutritional powerhouse:
- Oats provide complex carbohydrates and fiber for sustained energy.
- Nuts and seeds offer healthy fats and protein to keep you feeling full.
- Dried fruits add natural sweetness along with vitamins and minerals.
By controlling the ingredients, you can create a bar that’s tailored to your nutritional needs. I’ve found that starting my day with a balanced granola bar helps me avoid the mid-morning energy crash I used to experience with sugary cereals or pastries.
How a Balanced Breakfast Impacts Productivity
Research has shown that eating a balanced breakfast can significantly impact your productivity throughout the day. A granola bar paired with a piece of fruit or yogurt provides:
- Steady blood sugar levels for improved focus
- Essential nutrients to support cognitive function
- A feeling of satiety that helps you avoid distracting hunger pangs
I’ve noticed a marked improvement in my morning concentration and energy levels since incorporating homemade granola bars into my routine.
Real-Life Success Stories from Busy Mornings
Don’t just take my word for it – here are a few success stories from friends and family who’ve adopted the homemade granola bar habit:
- Sarah, a busy mom of three, says her mornings are much smoother now that she has a grab-and-go option for herself and her kids.
- Mike, a college student, credits his improved grades to starting the day with a nutritious breakfast that keeps him focused through long lectures.
- My own partner, who used to skip breakfast altogether, now looks forward to trying the new flavors I come up with each week.
These real-life examples demonstrate how a simple change in your breakfast routine can have a ripple effect on your entire day.
Starting your day with homemade granola bars is more than just a breakfast upgrade—it’s a game-changer for your mornings. With the perfect mix of flavor, nutrition, and convenience, these bars make meal prep feel like a treat, not a chore. So, grab your apron and try a batch this weekend! Your future mornings will thank you.
Have a favorite granola bar flavor? Share it in the comments—I’d love to try it!

